2DCutAhead Basics
The 2DCutAhead software is like a sibling of CypCut, with similar design, user interface and features. We will go through the basic workflow in this section.
NOTE
We recommend to install 2DCutAhead on your office computers. It will work in the “demo” mode without talking to the laser control system, but still can help you prepare cutting jobs, or just learn how to use it.
NOTE
2DCutAhead comes with only entry-level nesting functions, we recommend to use a more advanced nesting software if big volume productions are your major machining scenario.
Workflow
- Import or construct parts.
- Set technology.
- Nest parts.
- Check technology.
- Machining.
Import or Construct Parts
If you construct your parts with another CAD-system (e.g. AutoCAD), just import them into 2DCutAhead.
In the menu File, click Import and then select a parts file to import.

We recommend to use the part library and the nesting function to manage your job and improve machining efficiency for big volume productions. Select a part, right-click to bring up the context menu, click Add to Part List to add it to the library.

Or, you can import parts directly into the library. In the menu Nest, click Part and then Add Parts.

You can also construct simple parts in 2DCutAhead, add them to the library if you want to do nesting.
Set Technology
The cutting path will be prepared after setting technology, include leads, micro joints, tool corrections, processing sequence and cutting parameters, etc.
This operation can be done on both the free drawing outlines and the parts in the library.

Nest Parts
In the menu Nest, click Nest and fill out the settings in the popup dialog, then the parts will be optimally nested onto the raw material sheets.

Check Technology
We recommend to simulate the process in the software before machining to make sure everything is correct.

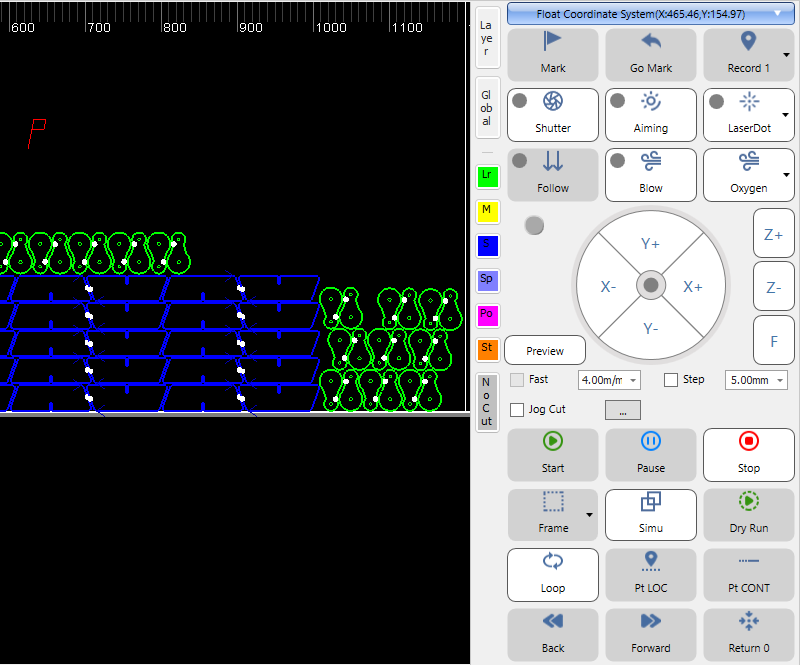
Machining
Set the system ready and start machining.
Handheld Remote
2DCutAhead also comes with a handheld remote for your convenience, which is very similar to the one comes with CypCut, integrates the most common operations, such as jogging, framing, starting and pausing a job, etc. Refer to CypCut Handheld Remote for more details.
With the remote, you can keep your eyes on the machine when moving the laser head, or controlling the machining process, avoid making mistakes or operation delays when switching back and forth between the software and the machine.