Skip to content
No results
  • Products
    • Fiber Laser Machines
      • EV-30 Laser Cutting Machine
      • LF-1530 Laser Cutting Machine
      • LF-6025 Laser Cutting Machine
      • EF-Hybrid Laser Welding Machine
      • EC-1500 Laser Welding Machine
      • FiberMark F2(MOPA) Laser Marking Machine
      • FiberMark F1 Laser Marking Machine
    • Fiber Laser Accessories
      • Fiber Laser Auxiliaries
    • CO2 Laser Machines
      • H-1325 Laser Cutting Machine
      • G-1325 Laser Cutting Machine
      • H-1610 Laser Cutting Machine
      • X-1309 Laser Cutting Machine
      • X-7050 Laser Engraving Machine
    • CO2 Laser Accessories
      • CO2 Laser Optics
      • CO2 Laser Tube
      • CO2 Laser Power Supply
      • CO2 Laser Auxiliaries
  • Shop
    • ON SALE
  • Support
    • Knowledge Base
    • Software & Driver Downloads
    • Troubleshooting
  • Contact Us
Login / Sign Up
  • Login
  • Sign Up

Forgot Password?

A link to set a new password will be sent to your email address.

Your personal data will be used to support your experience throughout this website, to manage access to your account, and for other purposes described in our privacy policy.

← Back to login
Login / Sign Up
Shopping cart$0.00 0
G.U. EAGLE LASER
  • Products
    • EV-30 Fiber Laser Cutting Machine

      Economical, high-speed, high-precision solution for sheet metal fabrication and production; available in 3kW and 6kW variants.

      Working Area5′ x 10′ (1500 x 3000mm)
      Laser SourceFiber laser
      Laser PowerUp to 6kW
      Operating ModeCutting
      Find Out More

      Robust and reliable, high-speed, high-precision solution for sheet metal fabrication and production; available in 6kW, 12kW and 20kW variants.

      Working Area5′ x 10′ (1500 x 3000mm)
      Laser SourceFiber laser
      Laser PowerUp to 20kW
      Operating ModeCutting
      Find Out More

      Robust and reliable, high-speed, high-precision solution for sheet metal fabrication and production; available in 12kW and 20kW variants.

      Working Area8′ x 20′ (2500 x 6000mm)
      Laser SourceFiber laser
      Laser PowerUp to 20kW
      Operating ModeCutting
      Find Out More

      With 1,500 watts of available power, the EF-Hybrid fiber laser welding machine allows you to weld, clean, and cut all kinds of metal with ease.

      Working AreaHandheld / Open area
      Laser SourceFiber laser
      Laser Power1.5kW
      Operating ModeWelding / Cleaning / Cutting
      Find Out More

      With 1,500 watts of available power, the EC-1500 fiber laser welding machine allows you to weld all kinds of metal with ease.

      Working AreaHandheld / Open area
      Laser SourceFiber laser
      Laser Power1.5kW
      Operating ModeWelding
      Find Out More
      f2mopa-product-intro-img1
      FiberMark F2 Laser Marking Machine

      Our most compact, entry-level laser marking machine, equipped with a fiber or MOPA laser source, open working area, and your choice of lens.

      Working AreaUp to 7″ x 7″ (175 x 175mm)
      Laser SourceFiber laser / MOPA
      Laser PowerUp to 50W
      Operating ModeMarking
      Find Out More

      Fully enclosed, all-in-one laser marking machine including laser source, computer, monitor, mouse + keyboard, rotary unit, EzCad CAD/CAM software, and your choice of lens.

      Working AreaUp to 8″ x 8″ (200 x 200mm)
      Laser SourceFiber laser / MOPA
      Laser PowerUp to 100W
      Operating ModeMarking
      Find Out More

      We provide all necessary parts to get your fiber laser machine up and running.

      Find Out More

      Our largest open table flatbed CO2 laser (4ft x 8ft) which comes equipped with integrated exhaust system, high speed rack-driven gantry, and camera system for high-speed, automated cutting and engraving of acrylic, wood, cardboard, and more.

      Working Area 4′ x 8′ (1300 x 2500mm)
      Laser Source CO2 laser tube
      Laser Power Up to 300W
      Operating Mode Cutting / Engraving / Combined
      Find Out More

      High precision large-format CO2 laser cutting machine.

      Working Area 4′ x 8′ (1300 x 2500mm)
      Laser Source CO2 laser tube
      Laser Power Up to 500W
      Operating Mode Cutting
      Find Out More

      Closed-cabin CO2 laser cutting machine.

      Working Area63″ x 39″ (1600 x 1000mm)
      Laser SourceCO2 laser tube
      Laser PowerUp to 150W
      Operating ModeCutting / Engraving / Combined
      Find Out More
      X-1309 CO2 Laser Cutting Machine

      Our largest and most popular variable-height working area CO2 laser machine. Available with up to a 150-watts laser, this machine is designed for high-speed production, and can cut over 1″ of acrylic with a perfectly polished edge.

      Working Area51″ x 35″ (1300 x 900mm)
      Laser SourceCO2 laser tube
      Laser PowerUp to 150W
      Operating ModeCutting / Engraving / Combined
      Find Out More
      X-7050 Desktop Laser Engraving Machine

      Entry-level CO2 laser machine designed for extremely high-resolution engraving and fast cutting of acrylic, wood, cardboard, and much more.

      Working Area27.5″ x 19.7″ (700 x 500mm)
      Laser SourceMetal CO2 laser tube
      Laser Power40W
      Operating ModeEngraving / Cutting / Combined
      Find Out More

      Top-quality, American-made optics, to provide a consistent laser beam across the entire working area.

      Find Out More
      100-150W CO2 Laser Tube
      Up to 300W glass CO2 laser tubes, all with great cost performance ratios. Metal CO2 laser tubes allow you to get more done in less time with unmatched cutting and engraving quality.
      Find Out More
      100-150W CO2 Laser Power Supply

      Laser machines will get consistent cutting and engraving quality with our reliable laser power supply.

      Find Out More

      We provide all necessary parts to get your CO2 laser machine up and running.

      Find Out More
  • Shop
  • Support
    • Knowledge Base
    • Software & Driver Downloads
    • Troubleshooting
  • Contact Us
G.U. EAGLE LASER
Shopping cart$0.00 0
Home Documents Programming EAGLECAM or RDCAM Control Card
  • Technical Reference
  • August 25, 2021
  • 4 mins
Programming Control Card

RDCAM is a high performance control system embedded in laser machines, EAGLECAM is a customized version of RDCAM which support our premium EaglePrint print driver software.

The control card has a configuration profile stored in it according to the laser machine equipped with, to support the specific machine setup. Sometimes, you need to program the card corresponding to setup changes of the laser machine, like replacing a new control card, changing space between dual laser heads, temporarily disabling door sensor protection, etc..

We’ll guide you through the programming progress in EagleWorks (for EAGLECAM, almost same progress in RDWorks for RDCAM) in this document step by step.

Table of Contents

Programming Vendor Settings

The control card has a set of settings, protected by a password, generally programmed by laser machine manufactories, which is called vendor settings. But sometimes, you need to do that by yourself, especially for sales agency.

Please refer to sections below according to your specific needs.

Before starting

The laser machine needs to be powered on and connected with the computer which has EagleWorks installed on it. Open EagleWorks and follow steps below.

Read settings failed with "No Conected Device!" message?

If the laser machine is already powered on and connected with the computer, then there should be something wrong with the physical connection or connection settings in EagleWorks.

I Want to Program A New Control Card
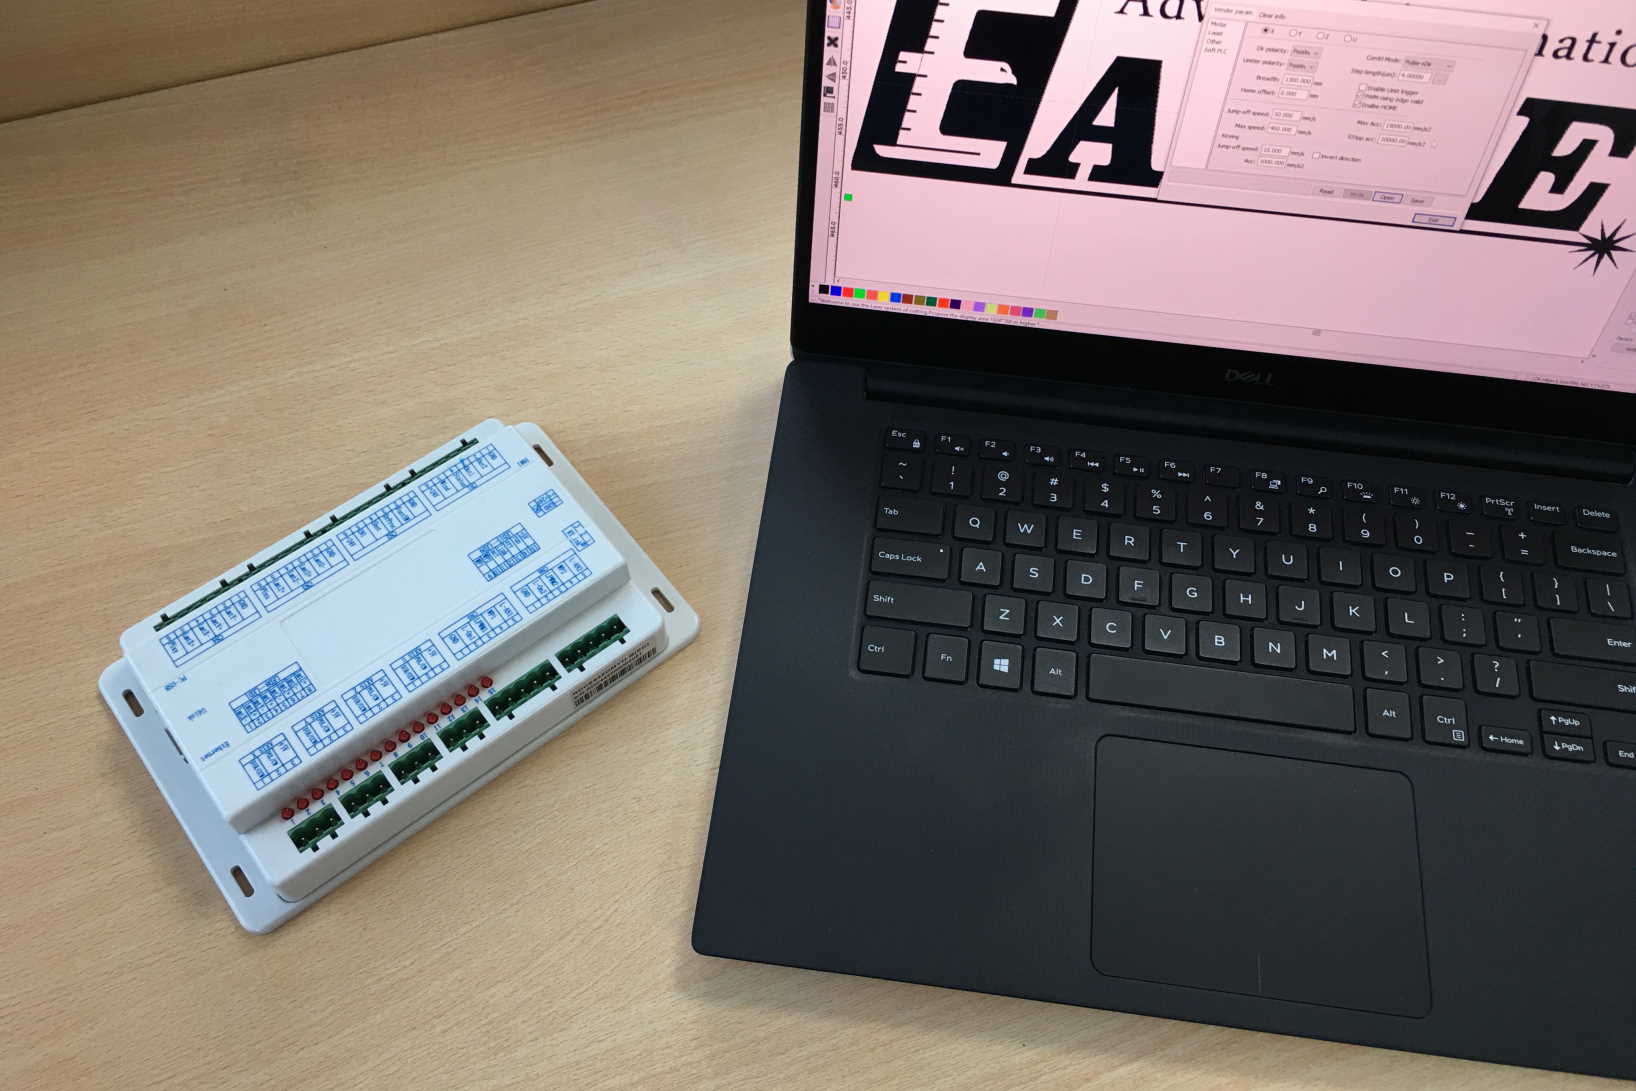
Before starting this programming progress, please contact us (or the laser manufacturer for your laser machine) to get the correct configuration profile for your laser machine.
  1. Open vendor settings dialog – Click on File -> Vendor settings menu item, you’ll see the Vendor Parameter Password dialog shown as below. Input “rd8888” as password, click on OK button, then you’ll see the vendor settings dialog.  
  2. Read settings from the laser machine – Click on Read button to get settings from the laser machine first. 
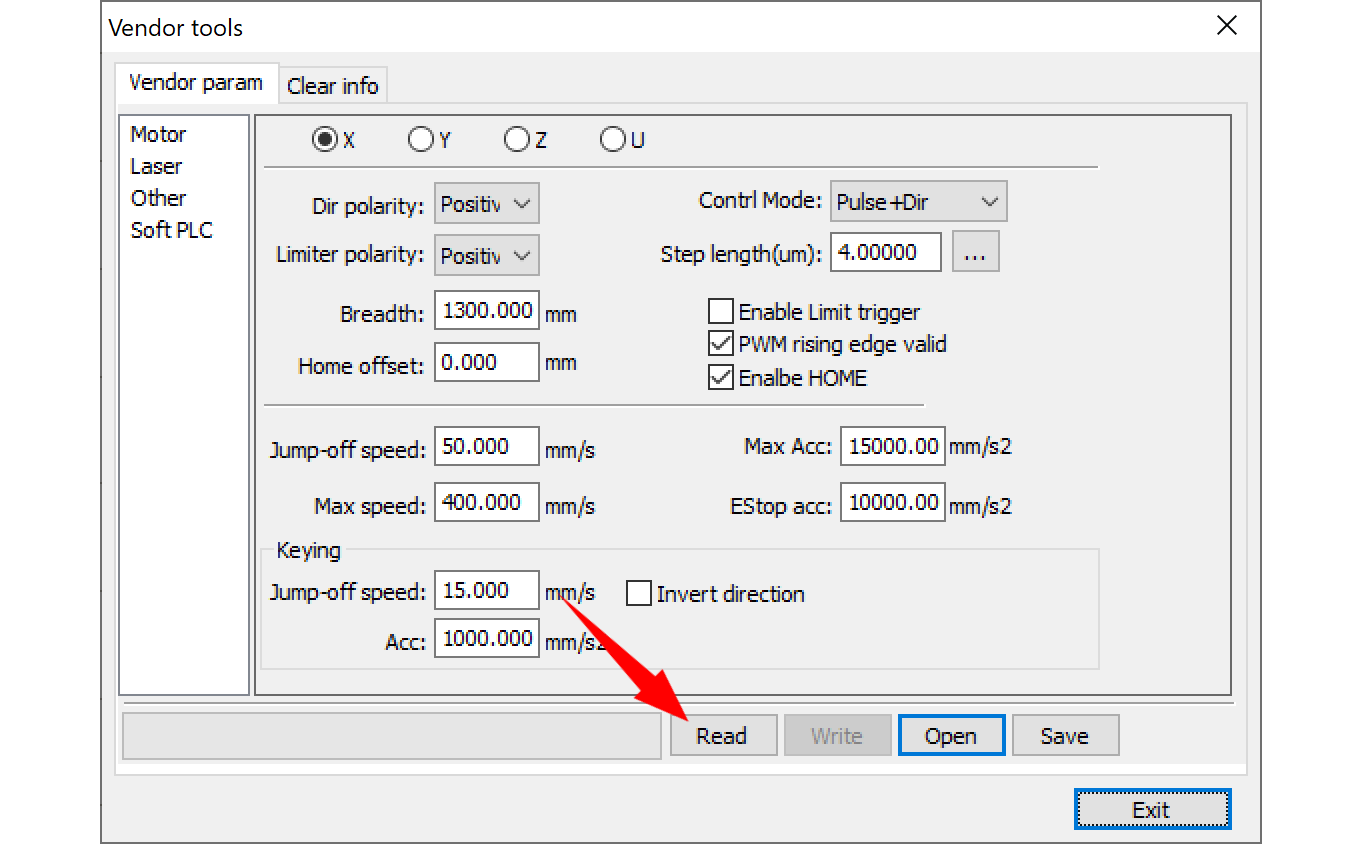
IMPORTANT: Don’t forget to do this step first, otherwise, the Write button will not be activated.
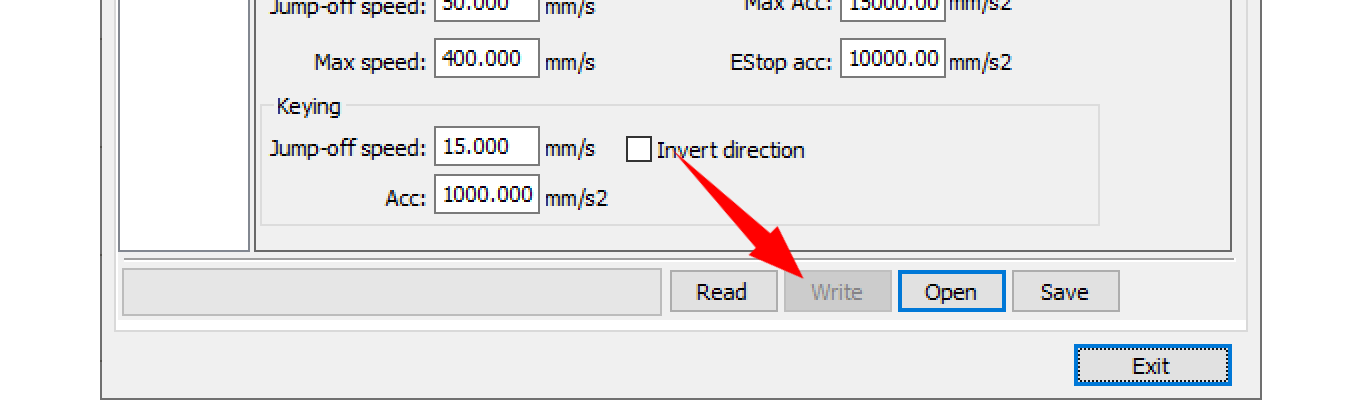
  3. Import the configuration profile – Click on Open button to import the configuration profile. It will overwrite current settings in the dialog. 
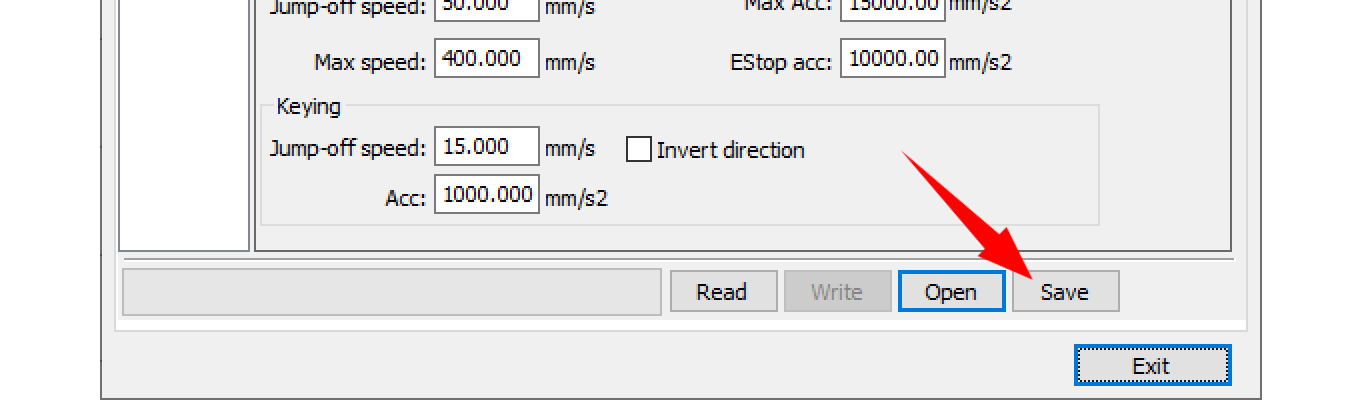
TIPS: Click on Save button to back up current settings to a file. Having a backup file is always a good practice, especially when you update control card after a mess.
  4. Write settings to the laser machine – Click on Write button to send settings to the laser machine.
  5. Restart the laser machine to finish programming – Some settings will be effective after restart. Please keep a hand on the emergency button to guard against any unexpected situation after programming.
I Want to Change A Specific Option

Before starting, please check the corresponding technical reference to your case carefully, or contact us about your specific needs, to confirm which option(s) to change.

Always Backup Current Settings

Always click the Save button in vendor settings dialog to back up the current settings, before making any changes.

  1. Open vendor settings dialog and read settings from the laser machine – Same steps as in the previous section.
  2. Back up current settings – Click on Save button to back up current settings, which can be used to restore the laser machine from a mess.
  3. Change the option(s) – Change settings according to your needs. Uncheck the Enable protect option here for example, to disable door sensor protection.
  4. Write settings to the laser machine and restart to finish programming – Same steps as in the previous section.
  5. Test if the laser machine behaves like what you expected – Check if the changes take effects. If there’s anything wrong, check out the technical reference or contact us for support. Or follow steps in previous section to restore the original settings if you want.

Programming User Settings

User settings, as the name revealed, are for changing some behaviors of the laser machine in daily use by the user, like changing return position after working, enabling rotary system, etc.. You can check them out in the User pane on right side of EagleWorks.

User Settings Pane in EagleWorks
- User Settings Pane in EagleWorks
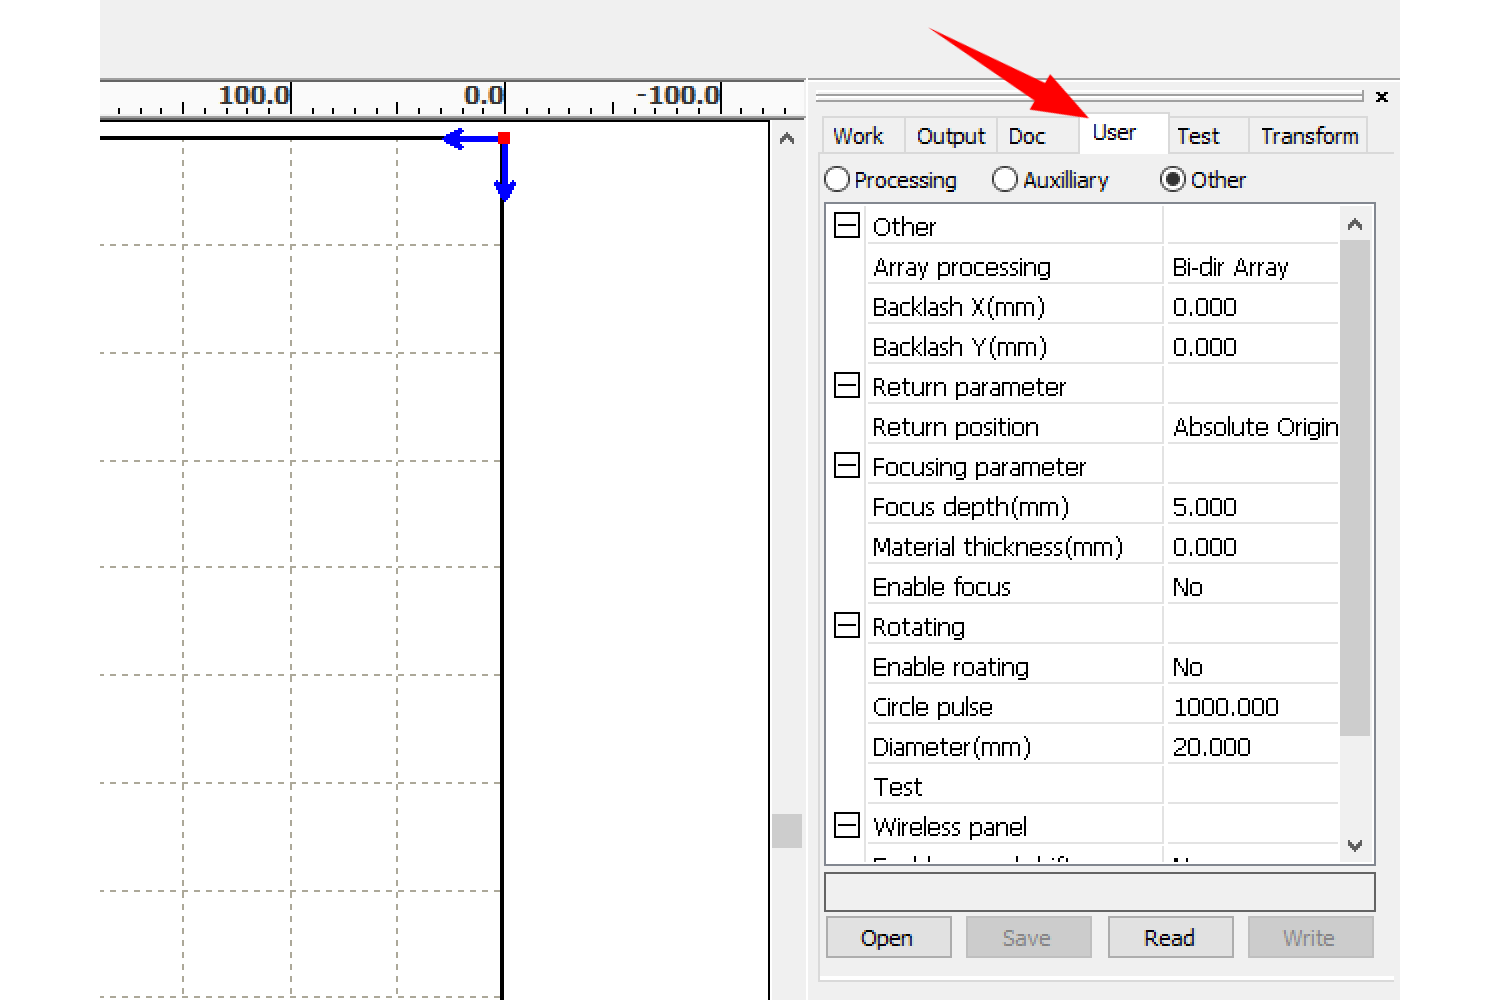
Please follow steps below to change user settings.
  1. Read settings from the laser machine – Click on Read button to get settings from the laser machine first.
  2. Change the option(s) – Change settings according to your needs. Change Return position to None here for example, to let the laser head stop at where it is after working.
  3. Write settings to the laser machine – Click on Write button to send settings to the laser machine.
  4. Restart the laser machine to finish programming – Some settings will be effective after restart. Please keep a hand on the emergency button to guard against any unexpected situation after programming.
Document Tags
# co2 laser cutting# co2 laser engraving# control card# eagleworks# rdworks# user settings# vendor settings
Previous Document How to Contact Technical Service Efficiently
Next Document Laser Head Can Not Get to Docking Point Set in EagleWorks Properly After Working

Leave a ReplyCancel Reply

Your email address will not be published. Required fields are marked *

Related Docs

Set up Laser Connections

  • November 15, 2023

The Workflow

  • November 15, 2023

Get Familiar with the EaglePrint UI

  • November 15, 2023

Auxiliary Machine Settings

  • October 24, 2023
Facebook X (Twitter) YouTube
  • Contact Us
  • My Account

Laser Machines

  • Industrial Laser Cutting Machines
  • Laser Welding Machines
  • FiberMark Laser Marking Machines
  • General Purpose Laser Cutting Machines
  • Large Format Laser Cutting Machines
  • Desktop Laser Engraving Machines

Shop Fiber Laser

  • FIBER LASER MACHINES
  • FIBER LASER ACCESSORIES

Shop CO2 Laser

  • CO2 LASER MACHINES
  • CO2 LASER OPTICS
  • CO2 LASER TUBE
  • CO2 LASER POWER SUPPLY
  • CO2 LASER ACCESSORIES

Support

  • Troubleshooting
  • Technical Reference

Contact Info

  • Address: 855 S Milliken Ave Ste E, Ontario, CA 91761
  • Phone: +1 626-671-4014
  • Email: sales@gueagle.com
  • Work hours: Monday to Friday
    8:30am - 5:30pm

Copyright © 2025 GU Eagle America, Inc.